Sunday, May 31, 2015

irises are in bloom!

A couple weeks ago I noticed two pretty large plants growing at the end of my driveway, in back of the rock wall.  At first I was thinking tulips (I don't know much about plants, obviously), but then they got really big and had big purplish buds on the ends.  What could these plants be?

Last weekend the husband and I went to the Webb-Deane-Stevens Museum in Wethersfield.  It was a gorgeous weekend and we were bored.  Plus we've been living up here for almost a year and had yet to really go anywhere other than Home Depot, Lowes, and the diners.  Other than being bored and wanting something to do, we were both anxious to see the insides of the three historical houses that make up the Museum.  The houses were built in the 1700s, just like ours.  It was interesting to see so many of the details of my house echoed in these houses.  It gave me some decorating ideas, as well. The added incentive for Bob was that they were having a Revolutionary War battle reenactment on the grounds.   That was fun.  No one died until the end, - they all kept firing and missing - but it was explained that the weapons of that era weren't the most accurate.  In order to increase their chances of hitting targets, they fired in a tight cluster formation.  Afterwards we walked around the grounds and I saw the same plants that are in my yard, and they were in full bloom:  irises.

So, here are my irises in full bloom.  Sadly, I only have one pink iris.  But I love that I have a whole bunch of two-toned purple ones, since purple is my favorite color.


Saturday, May 30, 2015

homemade hummus

I've been on a huge hummus kick lately.  Ever since I decided to snack on celery and hummus while at work, I can't seem to get enough of it.  I've been trying different brands (Tribe is my favorite brand right now) and flavors, like Lemon Rosemary Focaccia, Everything, Zesty Spice & Garlic, Roasted Garlic, and Mediterranean Style. Most of the time I can get it for roughly $2.00 for an 8 oz. container, but I decided maybe it would be more economical and tastier if I made my own.

So, I set out to online find the perfect hummus recipe (of course, everyone claims their is the best so this is tough).  The recipes are all so different.  Some call for using dried chick peas, which have to be soaked, rinsed and cooked (some have more elaborate instructions, too). Some call for canned chick peas, which a lot of people were dissing.  Some call for a lot of tahini or garlic, others don't. Some don't use olive oil and others do.  So confusing. 

I ended up going with Alton Brown's recipe for my first try (and my second).  It called for canned chick peas and I thought maybe dried chick peas would give it better flavor, so I bought those instead.  They had to be soaked overnight and then cooked before I could use them.  Something I neglected to notice in the recipe is that it calls for 1/4 cup of the liquid from the canned chick peas. So, mistake #1.  Another mistake I made?  I didn't measure the cooked chick peas.  The recipe calls for 30 oz.  I wrongly assumed that a 16 oz bag of dried chick peas would produce roughly 32 oz of cooked chick peas. Since I assumed rather than measured, I tossed them all in the food processor.  It made it very difficult to blend the ingredients.  Not to mention, it totally watered down the flavor.  The result was a very bland hummus.  I thought it would be a good idea to add more salt.  I did...and ended up over salting it.  It wasn't bland anymore - it tasted like I dumped the whole salt shaker in it.  It all went in the trash.

I tried it again this weekend.  Same recipe, but with canned chick peas.  And I bought new tahini.  The tahini I used the first time had been in my fridge for...awhile.  This time the result was much better:  smooth hummus that tasted like hummus.  It was a bit salty for my taste, though.  I added some more lemon juice and that helped slightly.  Next time I think I will cut the salt in half.  I'm thinking it might taste even better if I put in the fridge and allow time for the ingredients to mingle.

Here's my hummus (made according to the recipe!):


Tuesday, May 26, 2015

ricotta cheese fritters

I've been looking for a use for the big tub of ricotta I bought a couple weeks ago.  I remember buying it for a reason, but quickly forgot about it.  That happens a lot with me.  I find a recipe I want to make, I buy the ingredients, and then I forget about it. So, this morning I decided to make a recipe I found online for ricotta cheese fritters.  Low carb, high protein, and they have lots of ricotta cheese, which I love.

The recipe is very simple to make and it comes together quickly.  I had all the ingredients on hand, but I made two substitutions:  I used ground nutmeg instead of grated (such a pain!) and used almond flour instead of regular flour.  Almond flour has more calories, but it also has more protein and less carbs.

The batter mixed up nice, but I could tell that these fritters might be a little fussy to cook.  The recipe calls for using olive oil for frying, but I didn't want the added calories so I used cooking spray.  I put the batter in the pan and made three fritters in the first batch.  It took awhile for them to set enough for me to flip them.  But even then they were still tough to flip, as the batter was just not thick enough.  The second batch of three came out much better.  The rest were cooked fairly easily without too much fuss.  I also put a few in a separate pan and fried them in olive oil.  It wasn't pretty.  In fact, it was a bit messy.  As soon as the batter hit the hot oil it just started splattering everywhere.  It seemed a bit dangerous, too.  I tried another batch using flour instead of almond flour thinking that the problem was the almond flour, but I had the same results. The fritters were just fussy to cook.

The fritters tasted pretty good, but not good enough for me to go through the hassle of cooking them.  I don't think I will make these again.

Here's the recipe for anyone who wants to try it:  Ricotta Fritters


These aren't burnt, they're just dark.


Sunday, May 24, 2015

the scale is moving!

I'm so happy to report that the scale is moving down again!  I'm now at 138 pounds lost!

I am hoping to get to under 200 pounds by June 15 (just 6 pounds until I'm 199!!), which is my next follow-up appointment.  A (hopefully)15 pound loss in 6 months isn't impressive for someone who's had gastric bypass, but I know logically that it's reasonable.  Especially after what I lost in the first year.  Basically any weight I lose now is all me.  It's not the surgery doing it.  I spent a lot of time snacking and not tracking my food intake, so that's what happens:  I don't lose weight.  BUT...I didn't gain either. That's a first for me.

While I haven't lost a ton of weight this time, I've developed some good habits finally, and that's what surgery is for:  it gives you a "reset" and gives you a chance to start over and develop good habits.  The fact that I've developed good habits is something to be proud of.  This is what I've done:


  • I now track my food with MyFitnessPal every day.  I sometimes slack on the weekends, but I still log some of my food.
  • I walk every day at work.  I make two laps around the outside of the building, which equals about 1 mile.
  • I've stopped eating so many peanuts.  And if I eat them, I measure.  And track.
  • I've started eating fruit or celery and hummus instead of Chex Mix.
  • I'm doing yard work.  Doesn't sound like an accomplishment, but it is for me. For years my husband had to do it by himself.  I either didn't want to do it, or I was too tired from being too fat, or any other excuse I could come up with.  I might come out and help a little bit, but I was quickly winded and overwhelmed.  I've realized over the last few months that I enjoy being outside. Having an awesome yard helps, too.

I'm not 100% sure what my weight goal will be.  I'm thinking about 20 more pounds and I'm done.  That would bring me to 180, which is the top of the weight range for my height and build.  But I'll see what the doctor says. 

Will I have skin removal surgery?  I don't know.  I always said I'd never do that, but as I lose more weight, I can definitely see why people change their mind:  they want their outsides to match their insides.  Plus, shopping for pants really gets to be an issue.  If I buy a size that fits my waist and allows room for the extra skin, the hips and legs are huge.  If I buy pants that fit the hips and legs, the waist is a little tight.  To the people who say, "Exercise! There's no reason to have surgery,"  I can exercise until the cows come home (and I DO exercise).  The extra skin is only going to reduce to a certain point.  40 years is a long time to stretch, retract, stretch, retract, stretch and retract your skin again.  That does a lot of damage.  And to those people that have said all I have to do is exercise and skin surgery (and gastric bypass) is the easy way out (and I know for a fact there are at least 2 people who know me who have said this), go get your own house in order before you comment on mine.  I've seen your house and it ain't no pretty sight.  


Saturday, May 23, 2015

more mystery plants

I need more help with identifying some mystery plants (or weeds) in my garden.  There are so many different plants sprouting up and I have no idea if they're weeds or not.  I've been thinking that if they pull out very easy, they're probably weeds.  But maybe that's wrong thinking.

The garden is looking better.  I started weeding it.  I do a little at a time so as not to get overwhelmed, which is pretty easy for me.  Maybe next year I will start the weeding earlier.  This year I wanted to see what grew in, since i have no idea what's planted out there.

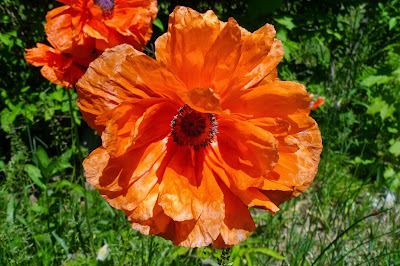
As you can see, it turned out that the scary-looking fuzzy plants are poppies.  They're blooming now and they look really nice.  The blossoms are huge!


I got a little plaque for Riley's grave.  I really wanted something personalized, but I think this is really nice, too.


And this is Riley.  RIP, buddy!


So, can someone help me identify these plants?


This is the top view of the same plant. The stalks are pretty sturdy, but they pull up very easily.


Probably a weed, not sure.


This doesn't seem like a weed to me, but it could be.


Same here.  It's not a great pic.  It's the fuzzy plant in the front.


Friday, May 22, 2015

asian marinade

I got this marinade recipe from Stop & Shop's Peapod Facebook page.  It's actually for flank steak, but all I had was boneless, skinless chicken thighs.  Close enough.  And I actually all the ingredients on hand.  Can you believe it?? (Actually I didn't have fresh ginger, but who usually does?? I used ground ginger.) I figured this would be a good way to use up some items that had been hanging around for awhile, as well as given the chicken something different than seasoned salt.

This was a very easy marinade, but I think putting the plastic bag in the bowl and mixing the marinade in the bag was a little awkward.  It worked, but it made me wonder why the recipe says to do it that way.  I'm guessing it was to save on dirty dishes, but, really, it's just one bowl.

I marinated the chicken overnight; I never cook the meat the same day I marinate, unless I make the marinade in the morning.  But that never happens since I always get up at the last possible minute.

I grilled the chicken.  It was kind of a pain to get the scallions to stay on the chicken, but a few of them did.  I'm guessing they were there more to flavor the marinade than to be grilled along with the chicken.

This tasted great!  The chicken was nice and juicy, and there was lots of flavor.

This is definitely something I would make again.

Here's the recipe:  asian marinade.  (Also below)


Asian Marinade

Ingredients:

1/4 cup low sodium soy sauce
1/4 cup balsamic vinegar
1/2 cup vegetable oil
3 Tablespoons honey
4 garlic cloves, minced
2 Tablespoons minced fresh ginger (I used tsp ground ginger)
3 scallions, thinly sliced
Meat of your choice

Directions:

Place a gallon-sized plastic bag in a large bowl and then add the soy sauce, balsamic vinegar and oil to the bag. Whisk in the honey, garlic, ginger and scallions. Add the meat to the bag, flipping it to coat it in the marinade, and then seal the plastic bag.

Place the meat in the fridge and marinate it overnight, or for a minimum of 10 hours.

When ready to cook, remove the meat from the fridge and preheat your cooking surface (grill or stovetop grill pan). Remove the meat from the marinade, discard the leftover liquid, and sear the meat on each side until it's cooked to your desired degree of doneness. Let the meat rest for 5 minutes and then serve.


Wednesday, May 20, 2015

poppies!

It's confirmed:  those scary looking fuzzy plants with the big pod at the end of each stalk are poppies.

It down poured here last night.  It seems that's what the poppies needed to start blooming; two of them bloomed this morning.

There are about 2 dozen plants in the garden so I should have lots of blooms very soon.

Saturday, May 16, 2015

making progress

I've started to spruce up the outside of the house.  As I've said before, I'm not a gardener, so I'm sticking with perennials (since they come back every year and are pretty easy to grow) and just a few annuals (cheap!).  And one tomato plant.  (I figure if I kill the tomato plant, I've only wasted a few dollars.)

I did a little weeding in the garden last night. It's a bit intimidating; there's a lot of plants in there and I have no idea which ones are weeds. I need a little help in identifying one of them (see below, last picture).  There's also lots of grass growing in.  I figure each time I go outside I'll pull a few weeds.  Eventually it will get done.  I planted some fast-growing ground cover in hopes that the grass will eventually be choked out.

Tomorrow it's on to mowing the lawn.  We have about an acre and a half and usually use the push mower. We have an old sit-down mower, but it needs two new tires.  I figure it takes about a full day to mow the whole lawn.  That assumes we take a few breaks to eat, drink and rest.   A couple weeks ago I mowed the lawn for the first time since I was kid and I enjoyed it. I get a lot of satisfaction out of it:  it appeals to the creativity and perfectionism in me, and I'm now physically able to do it without feeling like I'm going to drop dead.

Here's some pictures of my progress and a few plants I bought.


My lone tomato plant.  Wish me luck!


Just because I love this bush.  So pretty.  
It wasn't in bloom yet last weekend.  I love the wild look of it.


Columbine. Delicate, tissue paper-like flowers.  I love this.
This is going in the front of the house. 
Or maybe the rock wall. Not sure yet. It will grow into a four to five foot shrub.


English daisies and Tidal Pool Speedwell (?).  
These are going in the front of the house I think.
(Cat won't be planted.)


A few annuals.  Needs more weeding, but looking better than it was.


A few annuals next to the pond.


My new coffee table for the patio.  Tempered glass and metal; 
it was only $10.00 at a tag sale!
(Yes, I need to weed the patio.)


Anyone know what these are??  They're a little scary looking.


Friday, May 15, 2015

my post-op shopping list

Just in case there are any pre-ops, or post-ops, reading this blog, I figured I'd post a list of the things I buy to support my lifestyle.  Some other bloggers I read have done this and I find it helpful.  I'm sure I'm forgetting some things, but this is the bulk of what I buy.

Shake Ingredients
PB2 (powdered peanut butter)
Torani Sugar Free Syrups (I find these to be the best-tasting; very concentrated)
Unsweetened cocoa powder
Almond butter

Snacks:
Pork rinds (lots of protein, no carbs, and filling; these things have staying power)
Cheese sticks:  mozzarella, Gouda, cheddar (preferably low fat)
Nuts:  peanuts, pistachios, almonds
Celery and Hummus (I think I'm addicted to this stuff)
Strawberries
Watermelon
Fuji apples

Meats:
Chicken:  boneless and skinless thighs and breasts; Perdue Shortcuts Southwest flavor
Beef:  strip steak, ground beef
Canned tuna
Lunch meat, such as turkey and roast beef or low sodium ham (I try to buy nitrate-free, easier on my tummy)
Eggs

Protein:
Ready to Drink:  Premier Protein (I buy at BJ's Wholesale; 30g protein)
Bariatric Advantage Meal Replacement bags (27g protein; thick like a milkshake if you use the blender and some ice)
Bariwise Diet Hot Chocolate (15g protein)
Body Tech Whey Isolate Isolate (pretty thin, but lower in calories)
Syntrax Nectar (pretty thin, but lower in calories)
Quest protein bars (very occasionally)

Dairy:
Dannon Light & Fit Greek yogurt (half the sugar of other Greek yogurts!)
Fairlife Skim Milk (ultra filtered milk; half the sugar of regular milk)
Cheese:  pepperjack, muenster, feta, goat, cheddar, Swiss
Cottage cheese, low fat
Ricotta cheese, low fat

Miscellaneous:
Arrowhead Mills Multigrain Pancake Mix
Unsweetened fine coconut (usually Bob's Red Mill brand)
Crystal Light drink mix (Grape or Strawberry Watermelon)
Small flour tortillas (for the occasional "pizza")
Borsari Seasoned Salt


Monday, May 11, 2015

be prepared!

In my opinion, one of the worst ways to derail your post-op lifestyle, especially in the first year, is to not be prepared. By "prepared" I mean in terms of stocking your kitchen.

I find that if I have snacks and other items already prepped, I'm much less likely to eat things I shouldn't, like crunchy carbs (crackers, chips, Chex Mix).  These things are very processed, which means we can more of them than, say, chicken breast.  I went through a long phase in which that's all I wanted. I would buy Chex Mix, knowing that I can't control myself with it, under the guise of needing to have something in my desk at work "just in case."  As if hunger or the absence of a snack is a big tragedy.  It's not; I survived being hungry from time to time.

Anyway, my new go-to snack lately is hummus and celery sticks.  It satifies my urge for crunch, it tastes good, and it fills me up.  Believe it or not, the few days I was without last week were tough; I kept wishing I had remembered to go to the store and get more hummus.  Sorry, but I'm not a naked celery-type girl. Doesn't do it for me.

I've also started snacking on strawberries.  I sprinkle a little Equal on them.  I went shopping this weekend and also got some apples and watermelon.  I'm sticking to fruits that are lower in sugar so I can use them for snacking in place of higher calorie foods.

I spent yesterday prepping all my snacks:  washing the fruits. chopping the celery, and cutting up cheese.  Now I have a fridge full of healthy stuff I can grab at will.


Sunday, May 10, 2015

calling all gardeners!

I'm looking for a good reference for first-time gardeners.  I wouldn't say I'm ready to go gung-ho, but so far I've kept up with the plants I've planted and I'm actually paying attention to them; I think I'm ready to start learning.

Anyone have any suggestions?  Books? Magazines?  Websites?

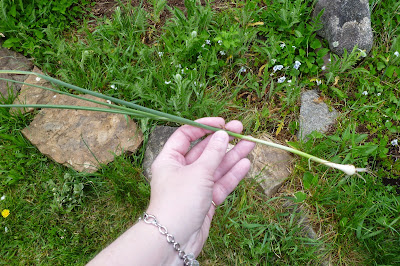
Also, can anyone tell me what this is?  Is it wild onion?  Wild garlic?  Flowering alliums?  When I pull them up or break off a stalk they smell like onions, but the internet is telling me wild garlic.  They're in the flower garden and I'm not sure if I should be cursing them or thanking nature for them.  Or eating them.


In the ground.  They're the tall ones in the center of the picture.


After being pulled.


Close-up of the bulb.


Close-up of the stalk.


Saturday, May 9, 2015

spring has sprung!

This is our first Spring in the new house and, boy, is it beautiful.  So much color coming out in the trees and lawn.

The other day I mowed the lawn for the first time since I was kid...with a push mower on an acre and a half!  That was quite a workout, and I only finished about a third of the lawn; I was out there for three hours.  According to MyFitnessPal I burned over 1,000 calories!  Not sure how accurate this is, but I'll take it.  No, I didn't go and eat a thousand calories worth of food.

My pet project is now getting the garden in order.  It's a patch of land in the middle of the backyard that has a small man-made pond and a stone wall.  I didn't bother with it last year since we were getting moved in and had a lot of fires to put out.  This year, though, I want to make it look nice.

I'm not a gardener and in the past have never had the inclination to do any gardening.  Wait, that's not true. I did, but I would go gung-ho, buy a ton of plants, start planting, and then fizzle out halfway through. And I'd end up killing whatever I planted.  Except hostas.  Those things cannot be killed by any means whatsoever. But now that I've lost weight and have a beautiful year, I want to make the garden look nice.  (Thankfully the house was landscaped pretty nicely when we bought it, so I don't have to worry about planting shrubs.)

I haven't done any weeding, mainly because there's so much grass in there it would take forever.  My plan is to add in some ground cover plants so they'll spread and eventually, maybe, choke out the grass.  I've already put in some creeping phlox and two green ground cover plants.  I've also planted a few other things.  There are already daffodils and tulips in there from the previous owner, so I'm happy about that.  It's bordered by natural stones, but I'll need to add some more.  Probably around the ferns in the front.  Bulbs will be planted in the Fall.

The look I want to go for is natural and somewhat wild, but contained.  Contained by natural stones, that is.  I don't want it to be manicured.  I haven't done research yet, but I'm guessing it would have been a more natural look at the time the house was built (1735).

Anyone have any ideas for me?  Any gardeners out there?

Here are some pics I took today.  Ignore the metal in some pictures; we lost our canopy to the wind last week and didn't take it apart it yet.  Click on the pictures to make them bigger.


Side of the house, looking out to the street.


Side of the house, looking out to the front.


Back yard.  Apple trees! 


The barn.  We think it's original.  We can see the ax marks where the beams were cut.


Driveway.


Garden.  It looks pretty wild, but there are some nice plants in there.  Ignore the broken gazebo frame.


Side of the house.  We have an awesome patio. :)


Stone wall in front of the house.


Side yard, looking out to the small pond.


Two geese and their babies at the pond, :)  They're so cute!!


Pond in the garden.  It really needs a pump!


Garden up close.


Thursday, May 7, 2015

food diary: 05/06/15

Although I went over my calorie allotment yesterday, I'll call it a good day:  I ate only half a bagel for breakfast. 

Bagels are my kryptonite. They were a huge problem for me pre-op and are still very hard for me to ignore.  It was easy for the first 10 months post-op, but then I tried a bite one day (at my old job that I hated; bagel=comfort) and that got me wanting bagels again.  I don't usually buy them, although once in a great while I will buy one and treat myself.  I know, I'm not supposed to eat this stuff as a gastric bypass patient, but I figure once in a great while is OK.  I'm not militant about life post-op.  Some people are and that works for them, but it doesn't work for me.  It just sets me up for failure and then the ensuing guilt; it turns in to a nasty, negative cycle.  So, yes, I give in once in awhile.

Another reason I'll call it a good day is that while I ate fast food for dinner, I didn't go overboard.  We visited a sick relative in the hospital last night.  Between having to drive there after work, visit, and drive back in a ton of traffic, we didn't get home until after 10 pm. So, Wendy's was the fast, convenient choice last night.  I got some chicken nuggets and had a few fries.  Blech.  Their chicken nuggets aren't great, which I guess explains why they're only $1.69.  And their fries aren't as good as they used to be.  But it filled the void.

I also got some exercise.  I've started walking around the outside of my building at work.  It's a half mile around so I go around twice.  It's only 20 minutes out of my day, I walk a mile, and I get to enjoy the weather - and I get a break from work!

FoodsCaloriesCarbsFatProteinCholestSodiumSugarsFiber

Breakfast
Panera - Sesame Seed Bagel, 0.5 bagel15530g2g5g0mg230mg2g1g
Panera - Light Plain Cream Cheese, 1 ounce651g6g3g18mg115mg1g1g
Generic - Raw Pinapple Chunks, 1/4 cup chunks4122g2g1g0mg2mg16g2g

Lunch
Russer - Ham Off the Bone, 2.75 OZ1244g6g14g41mg81mg4g0g
Gulden's - Spicy Brown Mustard, 1 tsp.50g0g0g0mg50mg0g0g
Boarshead - Domestic Swiss Cheese, 1 oz1100g8g8g0mg0mg0g0g
Strawberries - Raw, 2 oz(s)184g0g0g0mg1mg3g1g

Dinner
Wendy's - 6-piece Chicken Nuggets, 6 nuggets (90g)27014g18g14g45mg520mg0g1g
Wendy's - Kids' French Fries, 0.5 container11014g6g2g0mg120mg0g2g

Snacks
Any Fresh - Celery (Raw), 3 oz (29g)4512g0g3g0mg225mg0g6g
Tribe - Hummus-roasted Garlic, 56 g12012g7g2g0mg280mg0g2g
Reese's - Peanut Butter Cups Miniature, 1 pieces (44 g) (10g ea)445g3g1g1mg26mg5g0g
Butter - Salted, 1 tbsp1020g12g0g31mg82mg0g0g
Jiffy - Corn Muffin, Prepared, 1 muffin17027g5g2g5mg340mg7g1g
TOTAL:1,379145g75g55g141mg2,072mg38g17g


Exercises
CaloriesMinutesSetsRepsWeight
Cardiovascular
Walking, 2.0 mph, slow pace12030 
TOTALS:12030000

Wednesday, May 6, 2015

savory corn muffins with scallions and cheddar

I subscribe to Cooks Illustrated magazine.  It's a great magazine for someone who wants to understand how to perfect a recipe, and why a recipes works or doesn't work.  Basically, they pick a recipe and figure out how to make it better.  It's really interesting.

Sometimes I make one of the recipes, but I tend to be very careful about what I decide to make.  Many of their perfected recipes are "perfect" because there are multiple cooking methods or extra prep steps.  That's great when you want to really create something delicious and have the time, but not so great when it's a weeknight.  I don't usually feel like making anything complicated after I spent 8+ hours at work.

A recent issue contained a recipe for savory corn muffins.  They're not the typical corn muffin; they don't have a lot of sugar.  I figured this would be good for me since I'm now sensitive to sugar.  (Of course, I didn't stop to think that corn muffins are a dangerous food for me to have around and the recipe would guarantee I'd have muffins in the house for a week!) I had a bunch of cornmeal to use up, as well as a few other ingredients.  All I had to buy for this was the scallions and sour cream so I decided to make these this past weekend.

The recipe was easy to make, but there were multiple steps.  Cooking the cornmeal and milk, melting butter, assembling the dry ingredients, then whisking in certain ingredients to the cornmeal mixture, then whisking in the dry ingredients.  It wasn't difficult.  It was just a matter of assembling the ingredients ahead of time and following the directions carefully.  And reading the directions all the way through before starting.

These muffins came out really good. They were definitely savory, not sweet at all.  Unfortunately, I couldn't taste the cheddar cheese and there was quite a bit in there. While I liked them, I think next time I will buy sharp cheddar cheese; all I had was mild, so that's what I used.  I think the scallions kind of overpowered the cheese.  In addition, I'll likely make them with my mini muffin pan in order to minimize the damage to my calorie bank; corn muffins are very high in calories and fat!

There are only nine muffins in the picture - I wanted symmetry to make a pretty picture.  I got 15 muffins from this recipe.  Maybe my regular-sized muffin tin is slightly smaller than what Cooks Illustrate used.


Savory Corn Muffins with Scallions and Cheddar

From Cooks Illustrated

2 cups yellow cornmeal, to be divided
1 cup all-purpose flour
1 1/2 tsp baking powder
1 tsp baking soda
1 1/4 tsp salt
1/2 tsp pepper
1/4 tsp dry mustard
Pinch cayenne pepper
1 1/4 cups milk
1 cup sour cream
8 tablespoons unsalted butter, melted and cooled slightly
3 TB sugar
2 large eggs, beaten
1 1/2 cups shredded cheddar cheese
5 scallions, thinly sliced


  1. Heat oven to 425. Adjust the oven rack to the upper- middle position. 
  2. Either grease or line a 12-cup standard muffin tin with disposable liners.
  3. Whisk 1 1/2 cups cornmeal, flour, baking powder, baking soda, salt, pepper, mustard and cayenne together in a medium bowl. 
  4. In a large bowl, combine milk and remaining 1/2 cup cornmeal. In a microwave, cook cornmeal–milk mixture for 1 1/2 minutes, then whisk thoroughly.  Continue to microwave in 30-second increments, mixing in between, until the mixture is thickened to a batter-like consistency. The whisk will leave a clear line across the bottom of the bowl that slowly fills in. This will take 1 to 3 minutes longer. 
  5. Whisk butter, sugar, and sour cream into cooked cornmeal until combined. 
  6. Whisk in eggs, scallions, and cheese until combined. 
  7. Fold in flour mixture until thoroughly combined and the batter is very thick. Divide batter evenly among prepared muffin cups; it will mound slightly above the rim.
  8. Bake until tops are golden brown and toothpick inserted in center comes out clean, 13 to 17 minutes, rotating muffin tin halfway through baking to ensure even cooking. 
  9. Let muffins cool in muffin tin on wire rack for 5 minutes, then remove muffins from tin and let cool 5 minutes longer. Serve warm.

Tuesday, May 5, 2015

today's breakfast and lunch

I've been trying really hard lately to get back on track and count all my calories.  As part of that, I'm trying to find snacks that are low in calories, but satisfy my urge to snack.  I've decided that celery and hummus is my go-to just about every day.  I've also started eating strawberries.  They seem to be lower in sugar than other fruits, which means I can eat more of them without the sugar bothering me.  Within reason, of course.

Today's breakfast is Dannon Light & Fit Greek Cherry Yogurt.  I've decided to skip the peanuts I usually add; they're so high in calories.

Lunch is 3 ounces of low sodium turkey (4 slices) rolled with 1 ounce of Swiss cheese (2 slices, cut in half).  I've got some spicy brown mustard for dipping.  I used to put my nose up to mustard, but I've learned to appreciate it.  It packs a lot of flavor in a very small amount.

Snacks are celery and hummus, and a few strawberries.


Saturday, May 2, 2015

cast iron skillet: first try

Last year I bought an old cast iron skillet from a friend of mine.  She was having an estate sale and I got first dibs on stuff.  The basement was a treasure trove; her dad was a collector.  Hiding in the back corner I found a rusty old cast iron skillet.  I'd always heard from my parents how great cast iron is to cook with, so I decided to snag it.

It's been sitting under my outside grill all year long (I don't always get to things right away) and I finally decided to bring it in and try to use it.  To be honest, the idea of using and caring for cast iron was a little scary to me.  I'm not known for keeping up with maintenance.

Unfortunately, I didn't take a before picture showing all the rust and debris, but it was pretty run-down. Anyone who owns a really old cast iron pan likely knows how bad they can look when they rust.  I Googled how to clean and season a cat iron pan and found some good instructions.  So, I scoured it, scrubbed it, rinsed, dried, and seasoned it - twice.  This is the result.  The bottom still feels like it has crud on it, but it's baked in and I can't really see it so that's fine for now.


This is the skillet, with lid, after seasoning.


Skillet after seasoning.  Probably could have used more scrubbing before the seasoning, but figured I'd try it out like this.

The pan was sitting, cleaned and seasoned, on my stove for the last week so today I decided to try it out by making fried eggs.  I was pretty nervous about it.  By all accounts cast iron can be finicky if you don't clean it, season it, heat it and use it properly.  But I'm usually good at experimenting so I went for it.


I heated the pan on medium heat (I have propane, very hot!) for about 3 minutes without the butter.  I tested the heat by flicking some water on the surface.  When it danced, it was ready for butter.  I used about a tablespoon.


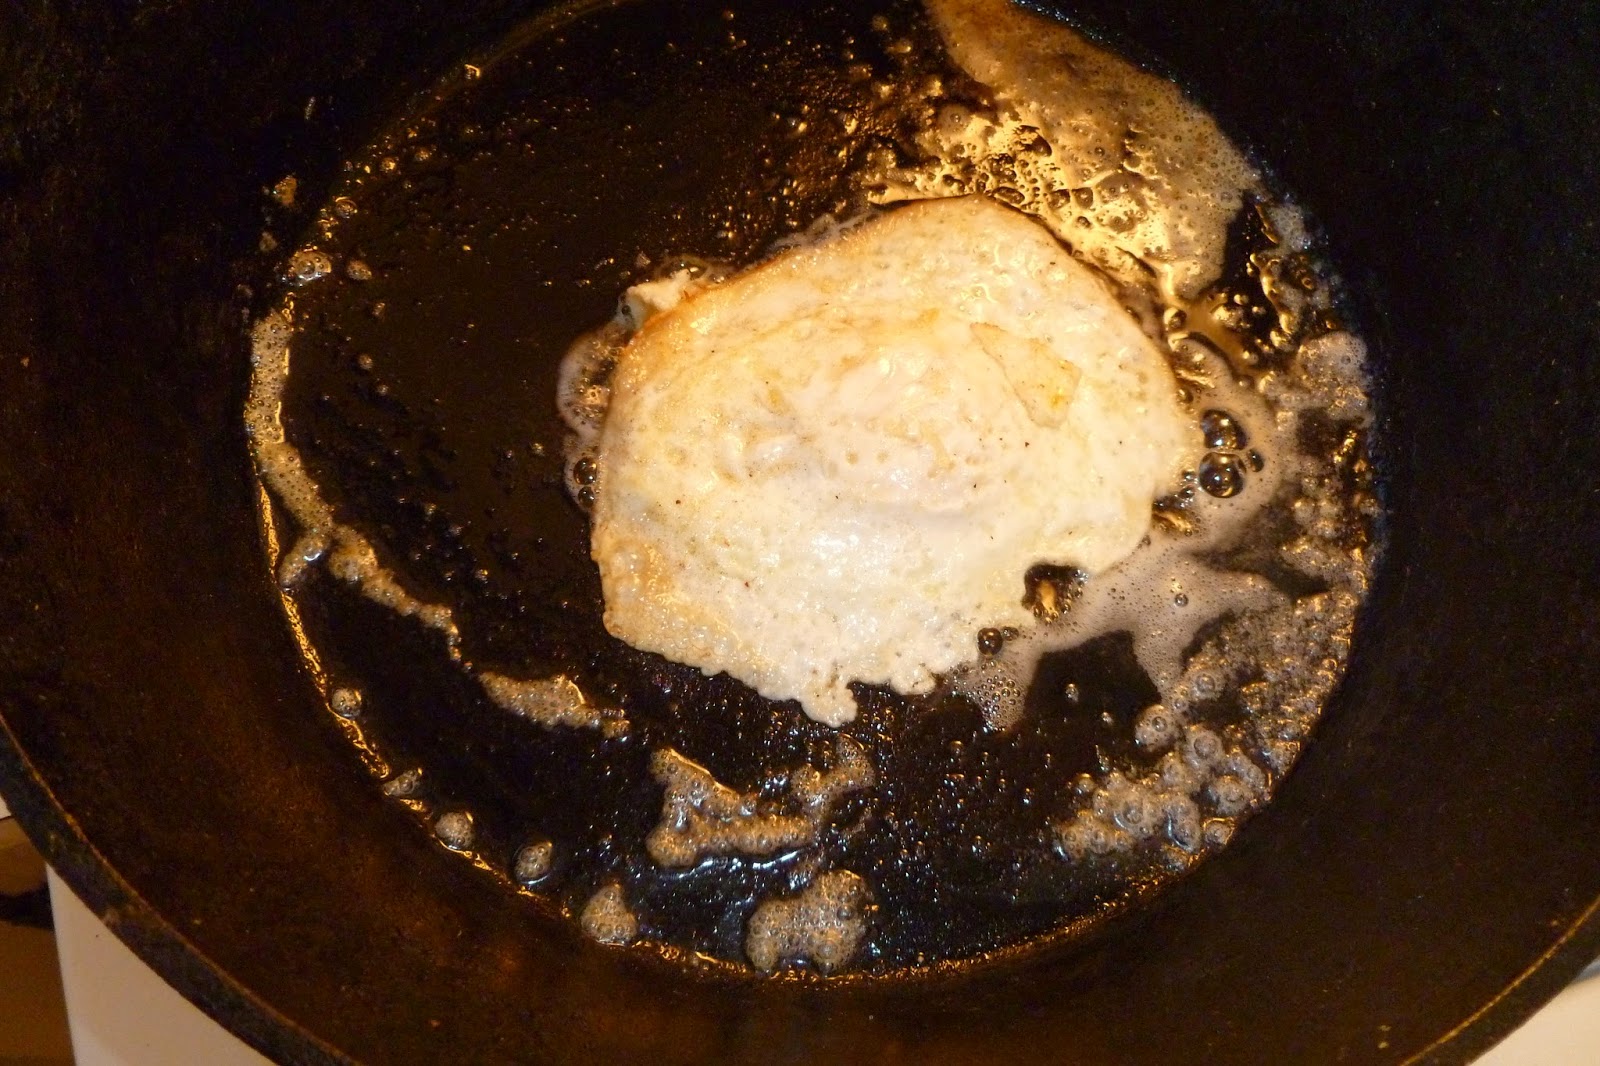
Egg #1. So far, so good.  Looks pretty!  Added salt and pepper.  Next time I will add it to the pan before the egg.  That's what the Great Internets say, anyway.


Flipped the baby over.  Still looks good.  Have to say, the grease popping scared the shit out of me.  I was trying to stand far back while still being able to reach the skillet to flip the egg.


Voila!


Egg #2.  Looks prettier than the first one.


Flipped it over...oops.  Broken yolk.  And it stuck to the pan a bit.  Next time I will add more butter to the pan for the second egg, or cook them together.  I cooked them separately so I could get comfy with the concept of cast iron.


Not a work of art, but the eggs look decent and the pan isn't a hot mess like I thought it would be.  The taste?  Better than eggs fried in a regular skillet and I loved the crispy edges.


The dirty pan.  Not too bad, huh?!  Just a bit of browned egg in the bottom and that's it.  


I cleaned the pan by scouring with kosher salt.  I rinsed the pan, dried it, heated it on the stove to completely dry it, wiped it with a bit of oil, then heated it again to start developing the seasoning layers. I have to say, it seems really strange to "clean" a pan with salt and oil.  But I will trust everyone that says this is the way to do it.


And it's clean again. Looks good!  Actually, I noticed it looks better than when I started.


Lessons learned:


  • Either add more grease to the pan in between eggs, or just fry them together. Normally that's what I would do, but I wanted to try one at a time so I don't ruin TWO.
  • Make sure the pan is good and hot before putting the food in; it takes longer to heat cast iron.  I did this correctly, but thought I'd throw this in here.
  • Wear an apron when cooking butter in a screaming hot pan!