I'm happy to say I'm 100% on track with eating AND exercise this week. I'm sticking with 1,200 calories per day, and that's not a lot of food. Even for someone that's had weight loss surgery. In order to feel like I have more food, I've cut out my delicious beloved homemade iced mocha latte I was drinking each morning. For now I' going to allow myself to have it once or twice per week. But once I'm done with surgery and it's time to maintain my weight, I plan to go back to them. At that point I'll be allowed about 2,000 calories and can afford it calorie-wise.
So, anyway, here's today's breakfast which is 195 calories (the same as my latte!). It's half of a Fiber One 12 Grain Sandwich Thin--toasted--with an ounce of herbed goat cheese and a hard-boiled egg. Very yummy and something different; I'm usually eating a Greek yogurt with dry roasted peanuts mixed in, or a couple hard-boiled eggs.
Note: This picture was taken and then uploaded with my phone, so it's dark and also upside down. :)
Showing posts with label eggs. Show all posts
Tuesday, February 7, 2017
Sunday, October 9, 2016
hard-cooked eggs in the Instant Pot
Last time I posted I said I'd let you know how it goes with the hard-cooked eggs. Well, it was very easy, the eggs peeled in a cinch, and they were perfectly cooked. The only issue was that two of them exploded out of the shell. Not an actual explosion, really. They just burst out of the shell as they cooked.
All I did was put a cup of water in the pot, put a single layer of eggs on the rack that comes with the pot (I was able to fit 14 eggs), close it up and set the cooker to "Manual" and "Low Pressure" for 7 minutes. I then turned it off and quick-released the pressure. Rinsed the eggs in cold water and I was done! Total time was about 20 minutes, since it takes about 5 to 10 minutes for the pot to come up to pressure.
The eggs were perfectly cooked. You can adjust the cooking time based on how done you like the yolks. Decrease for moist yolks, increase for firmer yolks.
Update: Forgot to add that these eggs were SOOOO easy to peel!! I'm convinced that this is the way to go when making eggs now. Almost nothing worse than a hard-boiled egg that won't let go of it's shell. More than once I've given up and just tossed the egg in the garbage because half the egg white is still attached to the shell.
All I did was put a cup of water in the pot, put a single layer of eggs on the rack that comes with the pot (I was able to fit 14 eggs), close it up and set the cooker to "Manual" and "Low Pressure" for 7 minutes. I then turned it off and quick-released the pressure. Rinsed the eggs in cold water and I was done! Total time was about 20 minutes, since it takes about 5 to 10 minutes for the pot to come up to pressure.
The eggs were perfectly cooked. You can adjust the cooking time based on how done you like the yolks. Decrease for moist yolks, increase for firmer yolks.
Update: Forgot to add that these eggs were SOOOO easy to peel!! I'm convinced that this is the way to go when making eggs now. Almost nothing worse than a hard-boiled egg that won't let go of it's shell. More than once I've given up and just tossed the egg in the garbage because half the egg white is still attached to the shell.
Here's one of my exploded eggs. Looks funky, but it tasted just fine.
As you can see, there's a bit of a dark ring around the yolk, which is likely because I let them sit 2 extra minutes after cooking.
Sunday, September 4, 2016
today's breakfast
Well, actually Friday's breakfast. But who's keeping track?
I went to Stew Leonard's Wednesday night and bought some of their awesome 9 Grain Bread. It makes the best grilled cheese. Although it's not very often I eat that anymore. Nowadays I buy it maybe once a year and usually use it for toast or as a base for an egg and cheese open-faced sandwich. That's what I did Friday morning since I had the day off from work.
I just toasted a slice of bread, added some goat cheese and a couple slices of tomato (tomato is courtesy of a co-worker's garden), and then topped it with a fried egg. It took some extra time because I toasted the bread first--I didn't want it to be soggy. Then I added the goat cheese and tomato and put it under the broiler. Once that was done, the egg went on top along with a ton of cracked pepper and a little salt.
It was delicious, but messy. Juicy tomatoes and runny egg yolk. This is a fork-and-knife kind of breakfast.
I went to Stew Leonard's Wednesday night and bought some of their awesome 9 Grain Bread. It makes the best grilled cheese. Although it's not very often I eat that anymore. Nowadays I buy it maybe once a year and usually use it for toast or as a base for an egg and cheese open-faced sandwich. That's what I did Friday morning since I had the day off from work.
I just toasted a slice of bread, added some goat cheese and a couple slices of tomato (tomato is courtesy of a co-worker's garden), and then topped it with a fried egg. It took some extra time because I toasted the bread first--I didn't want it to be soggy. Then I added the goat cheese and tomato and put it under the broiler. Once that was done, the egg went on top along with a ton of cracked pepper and a little salt.
It was delicious, but messy. Juicy tomatoes and runny egg yolk. This is a fork-and-knife kind of breakfast.
Thursday, July 28, 2016
beef taco egg muffins
We had tacos last week, so I had a bunch of stuff in the fridge to use up. What better way than to make egg muffins? You can throw pretty much anything in these and they'll come out great. They freeze well, too. (Actually, Bob had tacos. I threw some tortilla chips in a bowl and topped them with the taco ingredients.)
Beef Taco Egg Muffins
Ingredients
8 oz. leftover taco beef (if yours has some liquid in it, make sure you don't put that in, as it will make the egg muffins soggy)
1/2 a medium onion, diced
3 Scallions, sliced
8 Eggs
1/4 Cup milk
1/4 Cup diced tomatoes
1 cup shredded cheddar cheese or Monterey Jack
salt and pepper to taste
Directions
- Preheat oven to 350°. Lightly spray a 12-cup muffin tin with non-stick spray.
- In a large mixing bowl, whisk eggs and milk. Mix meat, tomatoes, scallions, and salt and pepper into the eggs. You can mix the cheese into the eggs, or you can put it on top of each muffin before baking, Your choice.
- Pour mixture into muffin tin. Bake for 25 minutes.
- Pop them out of the pan within 10 minutes so they don't stick to the bottom of the pan.
You can top these with some sour cream and salsa if you want to.
These taste best when warm from the oven, but they will chill or freeze and reheat just fine for at least 4 to 5 days. If using the microwave to reheat, use 60% power so they don't turn out rubbery or hard around the edges. 100% power might kill them.
Note: If you've seen my other egg muffin recipes, you'll note that I always cook the veggies before I mix them with the eggs. Typically you should to release the water from the veggies. That way your eggs don't get soggy. In this case I didn't because I was being lazy and didn't feel like it. They came out fine, though.
Tuesday, July 26, 2016
baked egg boats
Whenever Bob goes camping, like this weekend, I usually make a special breakfast for when he gets home on Sunday. He usually stops for a fast food breakfast, but I like to make something to offset all the burgers and hot dogs he eats while he's gone. I don't mean I'm trying to offset the calories. Just making something a little more substantial, like a treat.
While scrolling through Facebook this weekend I found a recipe for baked egg boats. It looked very quick and easy. The recipe called for several items I don't have, like pancetta, heavy cream, baguettes, and Gruyere cheese, so I improvised. (OK, so basically I didn't have ANY of the items except the salt, pepper, and eggs.) No need to run out and buy stuff you'll only use once. And, honestly, you can use any ingredients you want here. Just pre-cook any veggies you use, since they tend to release water upon cooking.
Here's the original recipe: Baked Egg Boats
Here's my version. It's not a weight loss surgery-friendly recipe, since I wasn't making it for myself.
Baked Egg Boats
Ingredients
4 grinder rolls (long sandwich rolls--everyone calls these something different, depending where you live)
5 eggs
1/3 cup half & half (or milk)
8 breakfast sausgages, sliced
3 ounces shredded sharp cheddar (use any cheese you like, as much as you like)
2 green onions, thinly sliced
salt and pepper to taste
Directions
- Preheat oven to 350 degrees.
- Cut a deep “V” through the tops of each roll. Don't cut through the bottom, and make sure you leave the ends intact so the eggs don't run out. You want a nice dam to hold it all in. Partially unstuff the rolls. Set aside.
- Place the eggs and half & half or milk into a mixing bowl and lightly beat together. Whisk in the remaining ingredients and lightly season with salt and pepper.
- Divide and pour the mixture into each roll and place onto a baking sheet. Top with more cheese if you like.
- Bake for 20 to 25 minutes or until golden brown, puffed and set in the center. Season with salt and pepper. Note: I baked mine for 35 minutes, and I still had one that wasn't cooked all the way. You'll have to watch and test for doneness.
- Allow to cool for about 5 minutes, cut and serve.
Note: Don't throw away the "Vs" you cut out of the rolls. Toast them in the toaster oven and slather with butter. It will hold you over until the egg boats are done. I wouldn't want anyone to starve!
Sunday, April 17, 2016
today's breakfast
When I went to New Hampshire for Easter, I stopped at a store on the way and picked up some fresh maple breakfast sausage and fresh Polish kielbasa. I'm not sure whether to call it a convenience store, since there's a gas station there, too, or whether it's a county store. Anyway, they make a lot of foods from scratch, like pies and pastries, and they also have deli-type foods, like sandwiches and salads. Pizza, chicken and burgers, too. When I stopped this time, I discovered they sell meat and freshly made sausages and kielbasa. Of course, I had to buy some.
I made the maple breakfast sausage today. Look how big these links are!! I couldn't eat all this. I had the egg, two bites of sausage and about half the toast. The sausage was good and reminded me of the sausage at my favorite diner back home. That said, I'm not really a sausage person anymore since surgery. It just seems too greasy for me. I actually prefer the vegetarian sausages these days, or turkey or chicken sausage. This was good for a rare treat, though, and it actually wasn't greasy at all.
Tuesday, April 5, 2016
car shopping, exercise, and egg muffins
That just about sums up my weekend.
We had to go car shopping Saturday, because Bob's car decided to die
last week. He tried his best to fix it,
but it's a bad valve, which means replacing the head. A huge job to do himself (he hasn't done it
before) and expensive to have someone else do (not worth it for the age of the
car). So, we went shopping for a used
car. Since this was unexpected, we can't
quite spring for a new car yet. We ended
up getting a PT Cruiser...in red. PT
Cruisers are actually pretty nice. They're roomy in the cabin, have lots of
storage space in the back, and get good gas mileage, which Bob needs because he
drives 120 miles round trip for work every day.
We hope to pick it up tomorrow night.
My trainer gave me homework to do this weekend. My session was Friday night and I have
another tonight. Last weekend he didn't want me doing anything over the
weekend, but I'm not a newbie anymore so it's time to turn up the heat. My homework this past Wednesday and Saturday
was:
- Jogging in place, jumping jacks and mountain climbers, alternated three times for a total of 8 minutes
- Total of 40 walking lunges
- Total of 45 body squats
- Total of 30 squat jumps
- 4 sets of how ever many push-ups I can do (since I can only do about 1/3 of a push-up, it wasn't many)
Friday's routine consisted of mostly arm work using kettle bells at
different weights. What a workout that was!
I wasn't sore Saturday, though.
Thankfully!
After doing my exercise, I decided to make some egg muffins. I'd bought some Irish cheddar cheese a couple
weeks ago and wanted to use it. I also
had some jalapeno Havarti, which I got at Aldi yesterday. I made 6 with cheddar
and 6 with Havarti. I didn't want to use
regular breakfast sausage due to the high calorie content, so I used 3
Morningstar Farms veggie sausage patties. I also didn't want the added grease
from regular sausage. I've found since my surgery that I don't have much of a
taste for greasy food anymore. I also added a little skim milk this time, which
made them fluff up a little and have a softer texture. I've never added milk, but just decided to
this time for some reason. The
nutritional facts for work out like this (per muffin): 130 calories, 8g fat, 2g carbs, 11g protein.
Irish Cheddar Egg Muffins
8 large eggs
1/2 cup skim milk
3 Morningstar Farms Original Sausage Patties, chopped
3 scallions, sliced
1/2 cup onions, chopped
2 cloves garlic, minced
1/4 teaspoon salt
Dash black pepper
6 oz. Kerry Gold Skellig Sweet Irish Cheddar, chopped (use whatever
cheddar you want)
Preheat the oven to 350.
Spray a frying pan with cooking spray and heat the onions on medium
heat for about 5 minutes. Add the sausage, scallions and garlic and cook about 1
minute.
Beat the eggs with the milk, salt and pepper. Add the cooked
ingredients to the egg mixture and stir.
Spray a regular 12-cup muffin tin with cooking spray. Spoon the egg mixture into the cups. Sprinkle
the tops with cheese. (You could push the cheese down into the mixture, if
preferred. Then you'll have warm nuggets
of cheese inside when you cut them open.)
Bake until they are set in the center, about 20 to 25 minutes. Pop them out of the pan within 10 minutes so
they don't stick to the bottom of the pan.
These taste best when warm from the oven, but they will chill and
reheat just fine for at least 4 to 5 days.
Great for freezing, too. If using the microwave to reheat, use 60% power
so they don't turn out rubbery or hard around the edges. 100% power might kill them.
Thursday, December 31, 2015
eggs benedict with pesto
Last month I went to Whole Foods in the morning. They had their hot food bar filled with breakfast food, which I love because this particular location usually has a couple of selections that are different. One week they had a breakfast pizza, which was a crispy flatbread topped with scrambled eggs, bacon, and cheese, with a touch of olive oil. Another week they had their take on eggs benedict: sunny side-up fried egg on top of an English muffin with Canadian bacon and cheese, and then topped with a little pesto. This is what I've been wanting to try at home, and I finally had the opportunity.
Last week I attempted to make an appetizer for the Christmas potluck at work, but I ended up leaving it at home. I made antipasto skewers, which consisted of grape tomatoes, fresh mozzarella, pepperoni, and marinated mushrooms. Each skewer was then brushed with some jarred pesto sauce. However, the skewers kept splintering and I didn't feel good about bringing them to work; I didn't want to chance someone getting a splinter in their mouth. I ended up eating them at home throughout the week. I then wondered what to do with the half-used jar of pesto sauce. Then it came to me: I'll replicate Whole Foods' eggs benedict!
What prompted me to decide to make it was that I fried bacon Monday morning. So, why not make my own version inspired by Whole Foods' version? I, of course, didn't have any English muffins. I improvised and used half a hamburger bun. Not the same, but perfectly workable. I toasted it and then spread some goat cheese on it. (I didn't want to use plain old American cheese; it just tastes so...generic...these days.) I put the bacon on top. Then I fried the egg sunny side up and put it on top. I wanted to make the yolk somewhat congealed and not quite as runny, so I wrongly thought that broiling the sandwich would make that happen. Wrong! It just cooked the egg white on top. When I took it out the yolk was too runny, so I put it back in the frying pan to cook a little more. But, of course, the yolk broke. I put it back on the sandwich, and topped it with fresh ground pepper and some pesto.
It didn't look at pretty as I had hoped, but it tasted good! Unfortunately my Photoshop software is acting up, so I couldn't adjust the brightness or anything.
Last week I attempted to make an appetizer for the Christmas potluck at work, but I ended up leaving it at home. I made antipasto skewers, which consisted of grape tomatoes, fresh mozzarella, pepperoni, and marinated mushrooms. Each skewer was then brushed with some jarred pesto sauce. However, the skewers kept splintering and I didn't feel good about bringing them to work; I didn't want to chance someone getting a splinter in their mouth. I ended up eating them at home throughout the week. I then wondered what to do with the half-used jar of pesto sauce. Then it came to me: I'll replicate Whole Foods' eggs benedict!
What prompted me to decide to make it was that I fried bacon Monday morning. So, why not make my own version inspired by Whole Foods' version? I, of course, didn't have any English muffins. I improvised and used half a hamburger bun. Not the same, but perfectly workable. I toasted it and then spread some goat cheese on it. (I didn't want to use plain old American cheese; it just tastes so...generic...these days.) I put the bacon on top. Then I fried the egg sunny side up and put it on top. I wanted to make the yolk somewhat congealed and not quite as runny, so I wrongly thought that broiling the sandwich would make that happen. Wrong! It just cooked the egg white on top. When I took it out the yolk was too runny, so I put it back in the frying pan to cook a little more. But, of course, the yolk broke. I put it back on the sandwich, and topped it with fresh ground pepper and some pesto.
It didn't look at pretty as I had hoped, but it tasted good! Unfortunately my Photoshop software is acting up, so I couldn't adjust the brightness or anything.
As you can see, my yolk broke and the pesto started weeping olive oil.
This kind of looks like a snail under a blanket.
Sunday, July 5, 2015
today's breakfast
Today's breakfast was one fried egg and three crostinis.
I got these crostinis at the grocery store. It's become A Thing for me. I seem to be hooked on these things. I guess since they're crunchy, I don't think of it as eating bread. I never even had a crostini until last year. The house we moved to is very close to a Stew Leonard's store and they have prepackaged crostini. I picked some up to serve with my artichoke dip for a get-together. They were so good: crunchy, buttery and garlicky. I assumed that no other store would sell these, but I was wrong. The local store has them. Unfortunately, they vary in taste and quality. Sometimes they're rubbery and have only butter. Other times they're crunchy and have butter and garlic. The ones below turned out to be the former so I popped them in the toaster over for 10 minutes to crisp them up.
As you can see, I like a lot of pepper on my eggs, just like my dad. I recently found a little gadget in the store. It's a peppercorn cracker. I've been looking for a fresh pepper grinder, but they're so damn expensive. But then I found this. I believe it was $6.99. It looks like a bunny. You squeeze the ears and it cracks the pepper onto your food. And it's got a magnet so you can attach it to either the fridge or the range hood. I bought it mostly because it looks like a bunny, but it's handy, too.
I got these crostinis at the grocery store. It's become A Thing for me. I seem to be hooked on these things. I guess since they're crunchy, I don't think of it as eating bread. I never even had a crostini until last year. The house we moved to is very close to a Stew Leonard's store and they have prepackaged crostini. I picked some up to serve with my artichoke dip for a get-together. They were so good: crunchy, buttery and garlicky. I assumed that no other store would sell these, but I was wrong. The local store has them. Unfortunately, they vary in taste and quality. Sometimes they're rubbery and have only butter. Other times they're crunchy and have butter and garlic. The ones below turned out to be the former so I popped them in the toaster over for 10 minutes to crisp them up.
As you can see, I like a lot of pepper on my eggs, just like my dad. I recently found a little gadget in the store. It's a peppercorn cracker. I've been looking for a fresh pepper grinder, but they're so damn expensive. But then I found this. I believe it was $6.99. It looks like a bunny. You squeeze the ears and it cracks the pepper onto your food. And it's got a magnet so you can attach it to either the fridge or the range hood. I bought it mostly because it looks like a bunny, but it's handy, too.
Sunday, June 7, 2015
breakfast pizza
In the spirit of changing up breakfast a little bit, I made a mini breakfast pizza yesterday morning. It's quick and simple, and it tastes good.
I scrambled one egg with a little bit of milk. Then I chopped up two lite breakfast sausage links. I put the eggs on a small tortilla, topped it with the sausage and then added some shredded cheddar. I popped it into the toaster oven for about 4 to 5 minutes and voila: breakfast pizza.
You can mix this up any number of ways and it will be yummy.
I was able to eat about 2 1/2 wedges today. But to be honest, I've been eating really fast lately so I would probably have been fine with 2. I'm not adhering to the WLS rule, which is to eat slowly and take at least 20 minutes to eat a meal (that's how long it takes for the stomach to tell the brain it's full). So, I'm probably eating a little more than I should. Gotta work on that!
I scrambled one egg with a little bit of milk. Then I chopped up two lite breakfast sausage links. I put the eggs on a small tortilla, topped it with the sausage and then added some shredded cheddar. I popped it into the toaster oven for about 4 to 5 minutes and voila: breakfast pizza.
You can mix this up any number of ways and it will be yummy.
I was able to eat about 2 1/2 wedges today. But to be honest, I've been eating really fast lately so I would probably have been fine with 2. I'm not adhering to the WLS rule, which is to eat slowly and take at least 20 minutes to eat a meal (that's how long it takes for the stomach to tell the brain it's full). So, I'm probably eating a little more than I should. Gotta work on that!
Labels:
bariatric surgery,
eggs,
food
Saturday, June 6, 2015
sausage and hash brown casserole
Last weekend I decided to make a breakfast casserole. Partly because I had a ton of eggs to use up and partly because I thought my husband might like to come home from camping and have a nice breakfast. Plus, it's something different and he would have breakfast to take to work the rest of the week. And someone posted a link on Facebook to some breakfast recipes. Gotta love Facebook.
The recipe I found online called for a pound of pork sausage and a pound of hot pork sausage for a total of two pounds of sausage. It didn't specify if that was the ground sausage in a roll, or if it was Italian sausage. I went to the store Sunday morning to get the sausage and saw that they Jimmy Dean ground sausage roll was a whopping 5.49 - I need TWO of them. I saw the Italian sausage links were on sale for 3.49 per package. I decided to go that route and just squeeze the sausage out of the casings before cooking. Cheaper and, as it turned out, less greasy.
It all came together quickly, but the sausage and hash browns had to be cooked before mixing all the ingredients together. I'd say this could be done ahead so all you would have to do in the morning is mix it all up and then bake it.
It tasted great and was VERY filling. At least for me it was. But my stomach only hold so much these days. If I were making this just for myself I would probably omit the hash browns to lighten the calorie and carb load a little.
In case you didn't know, you can import an online recipe into MyFitnessPal and calculate the calories. it's an awesome tool, and useful, but sometimes scary. I imported the online recipe and then edited the ingredients to match the way I made it. The calorie count is a whopping 531 calories per serving assuming you divide it into 10 servings. (Serving size will vary: a WLS patient will likely get 20 servings from this recipe, but someone who hasn't had weight loss surgery might get only 8, depending on appetite.) If you omit the hash browns and cut the sausage to a total of 1 1/2 pounds, the calorie count is reduced to 394 calories per serving, again assuming 10 servings.
So, here's the finished product. I forgot to take a pic before we served ourselves, so this is the half that remained intact. I didn't want to post a picture of a half-eaten casserole. Recipe below.
Sausage and Hash Brown Casserole
Ingredients:
1 pound sweet Italian ground sausage (or links; remove from casings before cooking)
1 pound hot Italian ground sausage (or links; remove from casings before cooking)
1 20 oz. package frozen shredded hash browns
1 1/2 tsp salt, divided
1/2 tsp pepper
1 cup shredded Cheddar cheese, sharp or mild
6 large eggs
2 cups 2% milk
Directions:
The recipe I found online called for a pound of pork sausage and a pound of hot pork sausage for a total of two pounds of sausage. It didn't specify if that was the ground sausage in a roll, or if it was Italian sausage. I went to the store Sunday morning to get the sausage and saw that they Jimmy Dean ground sausage roll was a whopping 5.49 - I need TWO of them. I saw the Italian sausage links were on sale for 3.49 per package. I decided to go that route and just squeeze the sausage out of the casings before cooking. Cheaper and, as it turned out, less greasy.
It all came together quickly, but the sausage and hash browns had to be cooked before mixing all the ingredients together. I'd say this could be done ahead so all you would have to do in the morning is mix it all up and then bake it.
It tasted great and was VERY filling. At least for me it was. But my stomach only hold so much these days. If I were making this just for myself I would probably omit the hash browns to lighten the calorie and carb load a little.
In case you didn't know, you can import an online recipe into MyFitnessPal and calculate the calories. it's an awesome tool, and useful, but sometimes scary. I imported the online recipe and then edited the ingredients to match the way I made it. The calorie count is a whopping 531 calories per serving assuming you divide it into 10 servings. (Serving size will vary: a WLS patient will likely get 20 servings from this recipe, but someone who hasn't had weight loss surgery might get only 8, depending on appetite.) If you omit the hash browns and cut the sausage to a total of 1 1/2 pounds, the calorie count is reduced to 394 calories per serving, again assuming 10 servings.
So, here's the finished product. I forgot to take a pic before we served ourselves, so this is the half that remained intact. I didn't want to post a picture of a half-eaten casserole. Recipe below.
Ingredients:
1 pound sweet Italian ground sausage (or links; remove from casings before cooking)
1 pound hot Italian ground sausage (or links; remove from casings before cooking)
1 20 oz. package frozen shredded hash browns
1 1/2 tsp salt, divided
1/2 tsp pepper
1 cup shredded Cheddar cheese, sharp or mild
6 large eggs
2 cups 2% milk
Directions:
- Cook sausage in a large skillet over medium-high heat until cooked through. Break up the sausage as it cooks. Drain well.
- Prepare hash browns according to package directions, using 1/2 tsp salt and the pepper.
- Stir together hash browns, sausage, and cheese. Pour into a 13- x 9-inch baking dish that has been sprayed with cooking spray.
- Whisk together eggs, milk, and remaining 1 teaspoon salt. Pour evenly over potato mixture.
- Bake at 350° for 35 to 40 minutes, or until the center is set.
Saturday, May 2, 2015
cast iron skillet: first try
Last year I bought an old cast iron skillet from a friend of mine. She was having an estate sale and I got first dibs on stuff. The basement was a treasure trove; her dad was a collector. Hiding in the back corner I found a rusty old cast iron skillet. I'd always heard from my parents how great cast iron is to cook with, so I decided to snag it.
It's been sitting under my outside grill all year long (I don't always get to things right away) and I finally decided to bring it in and try to use it. To be honest, the idea of using and caring for cast iron was a little scary to me. I'm not known for keeping up with maintenance.
Unfortunately, I didn't take a before picture showing all the rust and debris, but it was pretty run-down. Anyone who owns a really old cast iron pan likely knows how bad they can look when they rust. I Googled how to clean and season a cat iron pan and found some good instructions. So, I scoured it, scrubbed it, rinsed, dried, and seasoned it - twice. This is the result. The bottom still feels like it has crud on it, but it's baked in and I can't really see it so that's fine for now.
Lessons learned:
It's been sitting under my outside grill all year long (I don't always get to things right away) and I finally decided to bring it in and try to use it. To be honest, the idea of using and caring for cast iron was a little scary to me. I'm not known for keeping up with maintenance.
Unfortunately, I didn't take a before picture showing all the rust and debris, but it was pretty run-down. Anyone who owns a really old cast iron pan likely knows how bad they can look when they rust. I Googled how to clean and season a cat iron pan and found some good instructions. So, I scoured it, scrubbed it, rinsed, dried, and seasoned it - twice. This is the result. The bottom still feels like it has crud on it, but it's baked in and I can't really see it so that's fine for now.
This is the skillet, with lid, after seasoning.
Skillet after seasoning. Probably could have used more scrubbing before the seasoning, but figured I'd try it out like this.
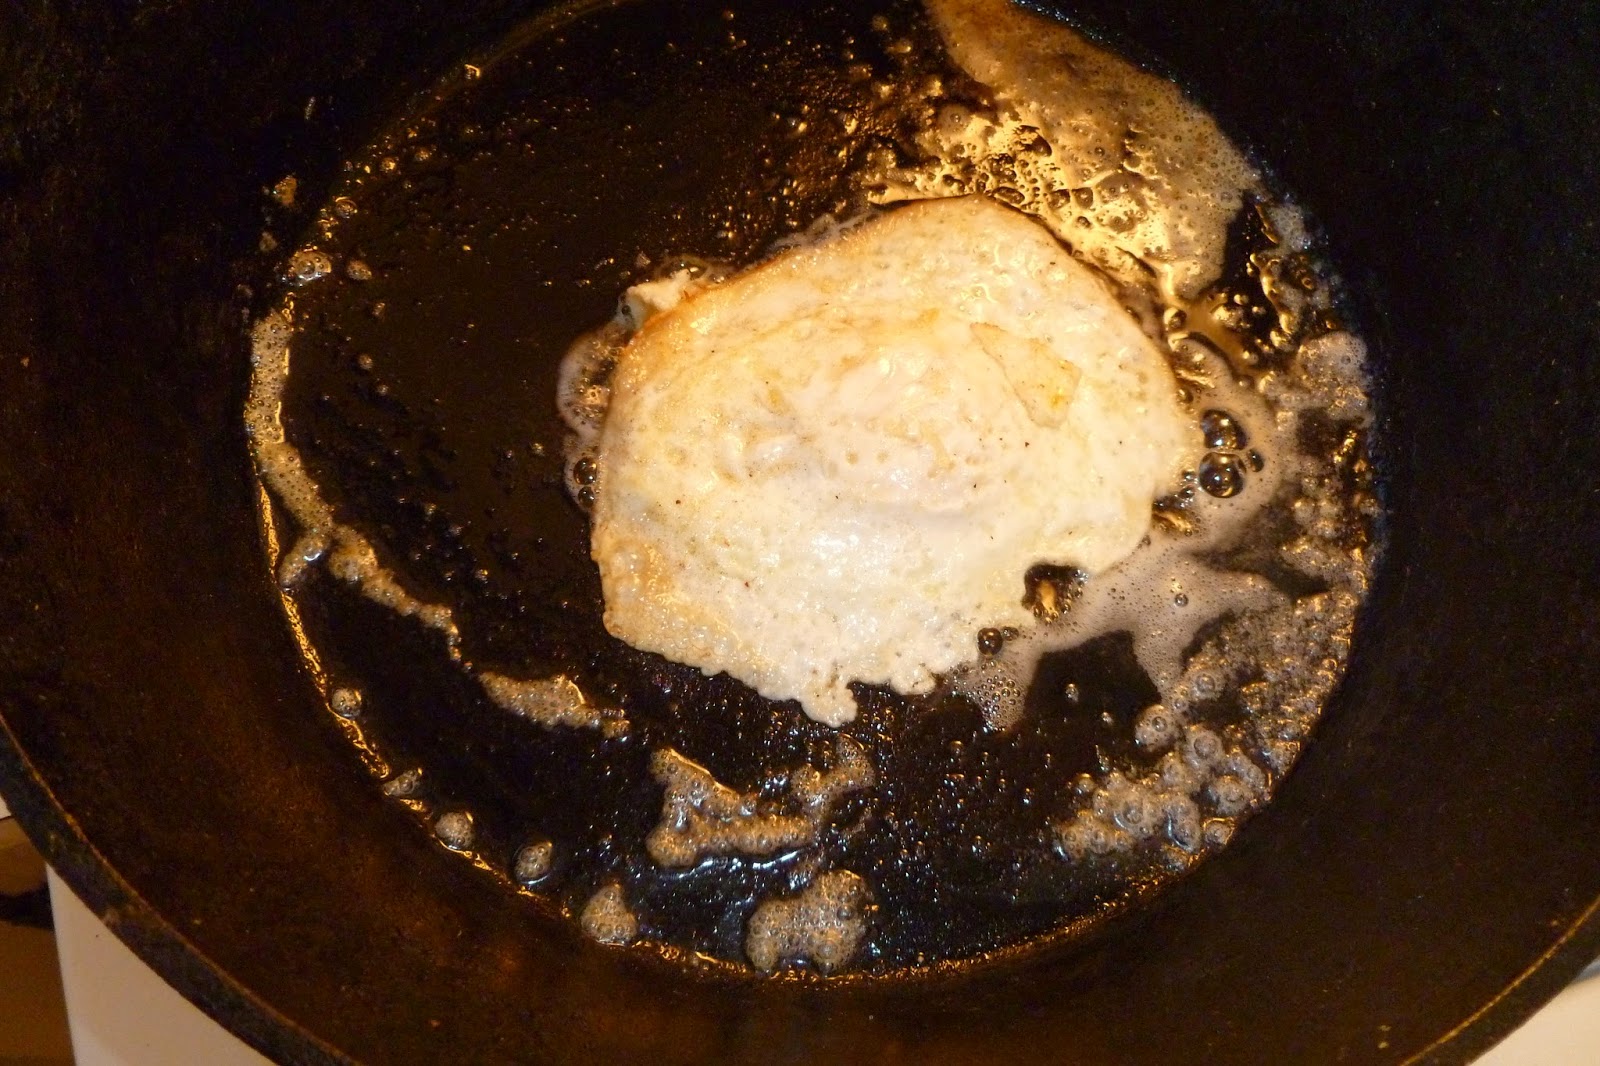
The pan was sitting, cleaned and seasoned, on my stove for the last week so today I decided to try it out by making fried eggs. I was pretty nervous about it. By all accounts cast iron can be finicky if you don't clean it, season it, heat it and use it properly. But I'm usually good at experimenting so I went for it.
I heated the pan on medium heat (I have propane, very hot!) for about 3 minutes without the butter. I tested the heat by flicking some water on the surface. When it danced, it was ready for butter. I used about a tablespoon.
Egg #1. So far, so good. Looks pretty! Added salt and pepper. Next time I will add it to the pan before the egg. That's what the Great Internets say, anyway.
Flipped the baby over. Still looks good. Have to say, the grease popping scared the shit out of me. I was trying to stand far back while still being able to reach the skillet to flip the egg.
Voila!
Egg #2. Looks prettier than the first one.
Flipped it over...oops. Broken yolk. And it stuck to the pan a bit. Next time I will add more butter to the pan for the second egg, or cook them together. I cooked them separately so I could get comfy with the concept of cast iron.
Not a work of art, but the eggs look decent and the pan isn't a hot mess like I thought it would be. The taste? Better than eggs fried in a regular skillet and I loved the crispy edges.
The dirty pan. Not too bad, huh?! Just a bit of browned egg in the bottom and that's it.
I cleaned the pan by scouring with kosher salt. I rinsed the pan, dried it, heated it on the stove to completely dry it, wiped it with a bit of oil, then heated it again to start developing the seasoning layers. I have to say, it seems really strange to "clean" a pan with salt and oil. But I will trust everyone that says this is the way to do it.
And it's clean again. Looks good! Actually, I noticed it looks better than when I started.
Lessons learned:
- Either add more grease to the pan in between eggs, or just fry them together. Normally that's what I would do, but I wanted to try one at a time so I don't ruin TWO.
- Make sure the pan is good and hot before putting the food in; it takes longer to heat cast iron. I did this correctly, but thought I'd throw this in here.
- Wear an apron when cooking butter in a screaming hot pan!
Saturday, April 11, 2015
perfectly poached eggs
Guess what? I don't know everything. No, really, I don't. It's shocking, I know. All these years I thought the right way to poach an egg was to crack it into a saucepan of simmering water and just hope for the best. I'd crack and egg into the pan and gradually the whites just kind of dissipated and I was left with a runny yolk surrounded by just a tiny bit of raggedy white. Meanwhile the water looked very cloudy, filled with bits of white that should have been around the yolk. They always tasted good, but they looked like a science project gone wrong.
This morning I had trouble trying to figure out what to have for breakfast. Today was a rare day when I had absolutely nothing at all planned, and nothing I had to do. I felt kind of lost, actually. I searched through the usual blogs I read to see if anything popped out at me. A couple things did, but of course I didn't have the ingredients. I then resigned myself to an egg omelet, or scrambled eggs, or.....I just couldn't decide. Then it occurred to me I could make poached eggs; however, my poached eggs always looked so sad. But then I remember the cookbook I got for Christmas and decided, what the hell? I'll try it.
So, today I decided to try making poached eggs from a cookbook, How Cooking Works (I love this book!). I don't always use cookbooks; I like to think I know how to cook and a cookbook is just for the really complicated things, or to find something different to cook. Well, I've realized that while I do know how to cook in general, either by watching my mom or sisters cook; or watching the Food Network; or using cookbooks, the internet, and magazines; or just plain old trial and error, there are some basics that I haven't quite mastered.
I put the cookbook on the stove right next to me so I can carefully follow the directions - I tend to just read through it once and not follow as closely as I should. I agonized a bit over the right pan to use, since the directions say to use a frying pan and fill it with about 2 to 3 inches of water. Frying pans don't seem that deep, so I almost pulled out a saucepan, but then I decided to just use the frying pan and not over think it. I filled it almost to the top with water. Then it was time to add 1 TB of vinegar. This is one reason I've always resisted making poached eggs the correct way; I was always worried I'd taste the vinegar. I opened the cabinet and realized, as usual, I didn't have any white vinegar. I was determined to make these eggs, so I added some apple cider vinegar. I figured if the vinegar could be detected, at least it would taste like apples. I boiled the water, and then turned it down to simmer. I then cracked an egg into a 1/2 cup measuring cup (that's what the recipe says to, which helps contain the white), brought the cup down into the water, and then slid the egg out of the cup into the water. Guess what?? The white stayed in place! It didn't start making a beeline for the sides of the pan like usual. I did the same with the second egg. I then started spooning the water over the tops of the eggs - you have to, otherwise the yolk won't cook on the top. In about 5 minutes I had two perfectly poached eggs and the whites were intact. I only lost a tiny piece of one white, which was negligible. I used a slotted spoon to fish them out and put them into a bowl. You can put them on a paper towel first if you're worried about getting water on your plate, but I didn't.
They tasted great, the yolks were thick and runny, and the whites were firm, but tender. I didn't taste any vinegar at all. I will definitely be making more poached eggs! And it's a perfect post-op breakfast: fast, goes down easy, nice and warm, and lots of protein.
Here's how to poach an egg (summarized from How Cooking Works). If you need a true step-by-step, go to The Kitchn; it's the same method.
Perfectly Poached Eggs
You'll need some eggs (fresher is better to avoid the whites running away from you in the pan), a frying pan, water, some white vinegar (or a mild vinegar if you don't have white), a 1/2 cup measuring cup or small bowl, a slotted spoon, and salt and pepper.
Instructions
This morning I had trouble trying to figure out what to have for breakfast. Today was a rare day when I had absolutely nothing at all planned, and nothing I had to do. I felt kind of lost, actually. I searched through the usual blogs I read to see if anything popped out at me. A couple things did, but of course I didn't have the ingredients. I then resigned myself to an egg omelet, or scrambled eggs, or.....I just couldn't decide. Then it occurred to me I could make poached eggs; however, my poached eggs always looked so sad. But then I remember the cookbook I got for Christmas and decided, what the hell? I'll try it.
So, today I decided to try making poached eggs from a cookbook, How Cooking Works (I love this book!). I don't always use cookbooks; I like to think I know how to cook and a cookbook is just for the really complicated things, or to find something different to cook. Well, I've realized that while I do know how to cook in general, either by watching my mom or sisters cook; or watching the Food Network; or using cookbooks, the internet, and magazines; or just plain old trial and error, there are some basics that I haven't quite mastered.
I put the cookbook on the stove right next to me so I can carefully follow the directions - I tend to just read through it once and not follow as closely as I should. I agonized a bit over the right pan to use, since the directions say to use a frying pan and fill it with about 2 to 3 inches of water. Frying pans don't seem that deep, so I almost pulled out a saucepan, but then I decided to just use the frying pan and not over think it. I filled it almost to the top with water. Then it was time to add 1 TB of vinegar. This is one reason I've always resisted making poached eggs the correct way; I was always worried I'd taste the vinegar. I opened the cabinet and realized, as usual, I didn't have any white vinegar. I was determined to make these eggs, so I added some apple cider vinegar. I figured if the vinegar could be detected, at least it would taste like apples. I boiled the water, and then turned it down to simmer. I then cracked an egg into a 1/2 cup measuring cup (that's what the recipe says to, which helps contain the white), brought the cup down into the water, and then slid the egg out of the cup into the water. Guess what?? The white stayed in place! It didn't start making a beeline for the sides of the pan like usual. I did the same with the second egg. I then started spooning the water over the tops of the eggs - you have to, otherwise the yolk won't cook on the top. In about 5 minutes I had two perfectly poached eggs and the whites were intact. I only lost a tiny piece of one white, which was negligible. I used a slotted spoon to fish them out and put them into a bowl. You can put them on a paper towel first if you're worried about getting water on your plate, but I didn't.
They tasted great, the yolks were thick and runny, and the whites were firm, but tender. I didn't taste any vinegar at all. I will definitely be making more poached eggs! And it's a perfect post-op breakfast: fast, goes down easy, nice and warm, and lots of protein.
Here's how to poach an egg (summarized from How Cooking Works). If you need a true step-by-step, go to The Kitchn; it's the same method.
Perfectly Poached Eggs
You'll need some eggs (fresher is better to avoid the whites running away from you in the pan), a frying pan, water, some white vinegar (or a mild vinegar if you don't have white), a 1/2 cup measuring cup or small bowl, a slotted spoon, and salt and pepper.
Instructions
- Fill the frying pan with about 2 to 3 inches of water (about 3/4 full depending on your pan depth) with water and bring to a boil. Turn the heat down and let the water simmer. You should see bubbles coming up to the surface, but it won't be a rolling boil.
- Crack the egg into a small measuring cup or small bowl.
- Add 1 TB vinegar to the water. This helps keep the white together. It's optional, though. If you're a pro at making poached eggs, you probably won't need to do this.
- Use the measuring cup to lower the egg into the water and then tip it out into the water. Make sure the water is at a bare simmer.
- Cook for 4 to 5 minutes, spooning simmering water over the tops of the yolks. If your pan is deeper, you probably won't need to do this. Note: As an alternative, you can cover the pan, remove from the heat, and let the eggs sit for 8 minutes.
- Remove the egg from the pan with a slotted spoon.
- You can put the egg on some paper towel to drain if you want to, but it's optional. I'd say if you're going to put it on a sandwich or salad, drain it. if it's just going in a bowl or on a plate, you can skip it.
- Season with salt and pepper.
See?! The whites are staying just where they should.
Don't they look gorgeous?!
Labels:
bariatric surgery,
eggs,
food
Sunday, March 29, 2015
today's breakfast
Today I made scrambled eggs for Bob and I and topped them with American cheese. They came out perfect: nice and creamy and soft.
I made some fried potatoes and onions with it. I bought a couple bags of red potatoes a few weeks ago (buy one get one free!) and I've been trying to use them up. Tonight I'll be using them to make mashed potatoes to serve with the Swedish meatballs I plan to make. No, I'm not making the meatballs from scratch - I have a huge bag of Ikea meatballs in the freezer -, but I'll be making the gravy from scratch. I've noticed that the Ikea gravy packets don't go very far at all so I ran out of them way before using up the meatballs. That's OK, because the Ikea gravy just seems so...cheap? processed?...I guess those are the right words to use. Tastes fine, but I'd rather make gravy from scratch.
This amounts to about 2 eggs, a slice of cheese and about 1/4 cup of potatoes. I was able to finish everything except a few potatoes.
I made some fried potatoes and onions with it. I bought a couple bags of red potatoes a few weeks ago (buy one get one free!) and I've been trying to use them up. Tonight I'll be using them to make mashed potatoes to serve with the Swedish meatballs I plan to make. No, I'm not making the meatballs from scratch - I have a huge bag of Ikea meatballs in the freezer -, but I'll be making the gravy from scratch. I've noticed that the Ikea gravy packets don't go very far at all so I ran out of them way before using up the meatballs. That's OK, because the Ikea gravy just seems so...cheap? processed?...I guess those are the right words to use. Tastes fine, but I'd rather make gravy from scratch.
This amounts to about 2 eggs, a slice of cheese and about 1/4 cup of potatoes. I was able to finish everything except a few potatoes.
Sunday, March 22, 2015
today's breakfast: a properly made egg omelet
I've ate and made many egg omelets in my lifetime. I make them for my husband and occasionally for myself, but apparently I haven't been making them the right way. I make them the way my mom did when she cooked for my grandmother: when one side is done and the egg is no longer liquid, you flip it to finish the cooking. But I've been reading How Cooking Works and am told that that's not the right way to do it. Not in so many words, but the diagrams imply it. The proper way is to cook it one one side until the eggs are no longer liquid, put any fillings in the middle, and then roll the omelet onto the plate. The residual heat cooks the center of the omelet.
I tried making a proper omelet for my husband last week and it was pretty flat. I'm thinking I used way too much butter in the pan. I don't usually use so much, but I had a piece of butter to use up. No sense in putting one little pat of butter in the fridge. He said it tasted good, though.
So, today I tried making one for myself. I beat two eggs with a little skim milk (my beloved Fairlife milk) with some salt and pepper. I used just enough butter to coat a hot pan. I poured the eggs in and it immediately started to set. I lifted the corners from the pan and tilted it to let the uncooked egg run underneath. Once there was almost no runny egg leftover, I added herbed goat cheese in a line down the middle. The I tilted the pan away from my and tried to nudge the corner over the middle (easier said than done!). It didn't roll itself like the book says, but I didn't destroy it either. So that was good. I then brought the pan to the plate and tilted the pan over so the omelet rolled over onto itself, finishing the roll.
I have to say, it tasted better than the omelets I usually make. Maybe because the inside is cooked just enough to keep it creamy. It was definitely a little flatter, but I find I now prefer an omelet made this way. It didn't seem as dense, which is good since I can't eat much in volume these days. Also, the omelet was browned a bit. Doesn't matter, really, but I keep hearing Chef Ludo Lefebvre in my head, screaming that there should be "no coloration!!" You'll know what I mean if you watched The Taste last season. My omelet doesn't look like his, but it was good!
The bonus in all this, other than mastering a proper omelet, is I used up the last of the goat cheese and didn't have to throw it away. Another meal to help me eat through the kitchen.
I tried making a proper omelet for my husband last week and it was pretty flat. I'm thinking I used way too much butter in the pan. I don't usually use so much, but I had a piece of butter to use up. No sense in putting one little pat of butter in the fridge. He said it tasted good, though.
So, today I tried making one for myself. I beat two eggs with a little skim milk (my beloved Fairlife milk) with some salt and pepper. I used just enough butter to coat a hot pan. I poured the eggs in and it immediately started to set. I lifted the corners from the pan and tilted it to let the uncooked egg run underneath. Once there was almost no runny egg leftover, I added herbed goat cheese in a line down the middle. The I tilted the pan away from my and tried to nudge the corner over the middle (easier said than done!). It didn't roll itself like the book says, but I didn't destroy it either. So that was good. I then brought the pan to the plate and tilted the pan over so the omelet rolled over onto itself, finishing the roll.
I have to say, it tasted better than the omelets I usually make. Maybe because the inside is cooked just enough to keep it creamy. It was definitely a little flatter, but I find I now prefer an omelet made this way. It didn't seem as dense, which is good since I can't eat much in volume these days. Also, the omelet was browned a bit. Doesn't matter, really, but I keep hearing Chef Ludo Lefebvre in my head, screaming that there should be "no coloration!!" You'll know what I mean if you watched The Taste last season. My omelet doesn't look like his, but it was good!
The bonus in all this, other than mastering a proper omelet, is I used up the last of the goat cheese and didn't have to throw it away. Another meal to help me eat through the kitchen.
Saturday, March 14, 2015
goat cheese!
I had half a log of herbed goat cheese in the fridge, so I'm trying to use it up as part of my Eat Through the Kitchen Challenge. Goat cheese is something I am loathe to let go bad in the fridge or to throw away; it's not cheap!
Last night I made a snack of goat cheese on crackers. But these weren't just any old crackers - they were American Vintage Wine Biscuits, Red Wine and Black Pepper flavor. I sampled them when I was in Whole Foods a few weeks ago and decided to grab a bag. I can't really describe the flavor other than to say they're very rich tasting with a hint of black pepper. They have just a tiny kick at the end. These crackers were made for the rich creaminess of goat cheese.
Today for breakfast I did a very loose take on Eggs Benedict: half a toasted English muffin topped with one sausage, one scrambled egg, and herbed goat cheese. It was delicious! I was able to finish it, but I was REALLY full. Probably would have been easier if I'd eaten slower; I kind of gobbled it down. (I need to STOP that!)
Labels:
eat through the kitchen,
eggs,
food,
snacks
Sunday, February 8, 2015
sunday breakfast
Today I tried something different: baked eggs.
I've seen them on the Internet and it looked quick and easy, so I decided to give it a try. I had a ton of turkey bacon in the freezer so I decided to defrost it. I cooked some for Bob's breakfast and used the rest for the baked eggs. There may have been some snacking in between...
The baked eggs came out good, but next time I will partially cook the bacon first; it was too soft for me and created a watery bottom. I cooked them for about 16 minutes, which is about 4-5 minutes more than what the recipe called for. I found after 12 minutes the eggs were more like a sunny side up and I'm not into that. I even broiled them for a couple minutes after the 16 minutes of baking. It produced a semi-cooked yolk, which was thick, but still a bit runny.
Bob got the leftover chicken taco mix I made last night. (I made chicken taco quesadillas, which I'll post soon. It's ground chicken, taco seasoning, chicken broth, scallions, and black beans.) I put it into an egg omelet with cheddar cheese, toasted an English muffin, and gave him a few strips of turkey bacon. The omelet was HUGE!
Baked Eggs
Makes 6 eggs
6 pieces of cooked bacon (I used turkey)
6 eggs
2 TB milk
Salt and pepper
Shredded cheddar cheese
I've seen them on the Internet and it looked quick and easy, so I decided to give it a try. I had a ton of turkey bacon in the freezer so I decided to defrost it. I cooked some for Bob's breakfast and used the rest for the baked eggs. There may have been some snacking in between...
The baked eggs came out good, but next time I will partially cook the bacon first; it was too soft for me and created a watery bottom. I cooked them for about 16 minutes, which is about 4-5 minutes more than what the recipe called for. I found after 12 minutes the eggs were more like a sunny side up and I'm not into that. I even broiled them for a couple minutes after the 16 minutes of baking. It produced a semi-cooked yolk, which was thick, but still a bit runny.
Bob got the leftover chicken taco mix I made last night. (I made chicken taco quesadillas, which I'll post soon. It's ground chicken, taco seasoning, chicken broth, scallions, and black beans.) I put it into an egg omelet with cheddar cheese, toasted an English muffin, and gave him a few strips of turkey bacon. The omelet was HUGE!
Baked Eggs
Makes 6 eggs
6 pieces of cooked bacon (I used turkey)
6 eggs
2 TB milk
Salt and pepper
Shredded cheddar cheese
- Preheat the oven to 325.
- Spray a muffin tin with cooking spray.
- Line each cup with one piece of bacon.
- Crack an egg into each cup.
- Pour a little milk over each egg.
- Sprinkle with salt and pepper.
- Sprinkle with shredded cheese.
- Bake for 10-12 minutes for sunny side up. I baked them for about 16 minutes, which set the whites on top.
- Serve immediately, or store in the fridge for use in egg sandwiches.
Bob's breakfast. As you can see, there's big difference in our meal sizes.
Wednesday, February 4, 2015
chicken taco egg muffins
I seem to have a bit of an obsession with buying eggs lately. Just about every time I go to the store I end up buying eggs. Usually because I'm planning on making egg muffins, or I'm planning on making Bob's weekday breakfasts ahead of time. Anyway, I've bought so many eggs that I had about 5 dozen in the fridge, Yes, 5 dozen. I'm a sucker for the 2 1/2 dozen packs they sell in Walmart. I've been trying hard to spend less out of necessity and this is usually the best deal. It's not like I won't use the eggs, so why not buy them?
I haven't made egg muffins in awhile so I decided this weekend I would make some. I didn't want to make sausage and goat cheese again since I already have a ton of those in the freezer. I wanted something different, preferably with ingredients I already have on hand. I also wanted something that uses taco seasoning. When I moved to the new house I bought a monster container of it at BJ's Wholesale. Six months later, I have no idea why I thought I needed that much and now I need to start using it.
I ended up making up my own recipe and I'm calling it Chicken Taco Egg Muffins. I browned half a pound of ground chicken, then added onions and scallions. Once that was cooked I added taco seasoning and water. Once thickened it mixed in black beans and then added the mixture to beaten eggs. I poured it all into a muffin tin and topped with shredded cheddar cheese.
They were pretty good, but next time I might add some corn, or maybe put chunks of cheddar in the mixture.
Chicken Taco Egg Muffins
8 oz. ground chicken
1/2 a medium onion, diced
3 Scallions, sliced
1 cup black beans, rinsed
10 Eggs
1 cup shredded cheddar cheese or Monterey Jack
Directions
Preheat oven to 350°. Lightly spray a 12-cup muffin tin with non-stick spray.
In a large skillet over medium-high heat, brown ground chicken with the onions. Add the scallions and black beans. Mix in 1/3 cup water and taco seasoning. Reduce heat to low and allow to simmer 3-4 minutes until thickened.
In a large mixing bowl, whisk eggs. Mix meat mixture into the eggs.
Pour mixture into muffin tin and top each cup with cheese. Bake for 25 minutes.
I haven't made egg muffins in awhile so I decided this weekend I would make some. I didn't want to make sausage and goat cheese again since I already have a ton of those in the freezer. I wanted something different, preferably with ingredients I already have on hand. I also wanted something that uses taco seasoning. When I moved to the new house I bought a monster container of it at BJ's Wholesale. Six months later, I have no idea why I thought I needed that much and now I need to start using it.
I ended up making up my own recipe and I'm calling it Chicken Taco Egg Muffins. I browned half a pound of ground chicken, then added onions and scallions. Once that was cooked I added taco seasoning and water. Once thickened it mixed in black beans and then added the mixture to beaten eggs. I poured it all into a muffin tin and topped with shredded cheddar cheese.
They were pretty good, but next time I might add some corn, or maybe put chunks of cheddar in the mixture.
Chicken Taco Egg Muffins
8 oz. ground chicken
1/2 a medium onion, diced
3 Scallions, sliced
1 cup black beans, rinsed
10 Eggs
1 cup shredded cheddar cheese or Monterey Jack
Directions
Preheat oven to 350°. Lightly spray a 12-cup muffin tin with non-stick spray.
In a large mixing bowl, whisk eggs. Mix meat mixture into the eggs.
Pour mixture into muffin tin and top each cup with cheese. Bake for 25 minutes.
Pop them out of the pan within 10 minutes so they don't stick to the bottom of the pan.
You can top these with some sour cream and salsa if you want to.
These taste best when warm from the oven, but they will chill or freeze and reheat just fine for at least 4 to 5 days. If using the microwave to reheat, use 60% power so they don't turn out rubbery or hard around the edges. 100% power might kill them.
You can top these with some sour cream and salsa if you want to.
These taste best when warm from the oven, but they will chill or freeze and reheat just fine for at least 4 to 5 days. If using the microwave to reheat, use 60% power so they don't turn out rubbery or hard around the edges. 100% power might kill them.
Labels:
bariatric surgery,
eggs,
food
Monday, February 2, 2015
breakfast pizza!
This is what I had for breakfast yesterday. It's just a small tortilla topped with a scrambled egg, turkey breakfast sausage, a few bits of hash browns (snatched those from hubby's breakfast), and some shredded cheddar. I popped it in the toaster over for about 6 minutes. I then splashed on a few drops of Tabasco sauce for kick. I made sure not to go overboard. Sometimes my post-surgery tummy doesn't like spicy foods. I don't get sick, but it causes my stomach to burn a little.
I was able to eat about 3/4 of it. Hubby got the last piece. I think he likes that I got the surgery, because he usually gets my leftovers.
Sunday, January 25, 2015
today's breakfast
Another departure from Greek yogurt and peanuts. Today I toasted half an English muffin, put a slice of cheese on it, then fried an egg and put that on top. Yummy. :)
Subscribe to:
Posts (Atom)